

The decision to have an organized cargo trailer specifically for all of our hunting gear was easily one of the best we’ve ever made. I didn’t go out of my way to clean it up, mainly because there’s a high demand for a walk through and I like to have a quick turnaround for special requests, but also because this is real life. We hunt a lot and it’s a mess more than it’s clean.

STORAGE BINS
We’ve been those people that purchased a bin for $100+ because they’ve got the logo of a brand we really like on it and we simply didn’t know any better. From the business side of things, kudos to that brand for having exceptional marketing and making me believe it was worth spending the extra money! From a consumer standpoint, I’m so annoyed because you can get FOUR of them for a little over $100, and probably find some even cheaper. I love these bins because they’re durable and sealed to protect from dust and water, they’re a good middle size so I can handle them well, they have holes at every corner for locks, and the handles are durable. I wish I could buy tons of these to store every day items, especially clothes, since we live in a travel trailer and obviously can’t hold our clothes for every season at once.
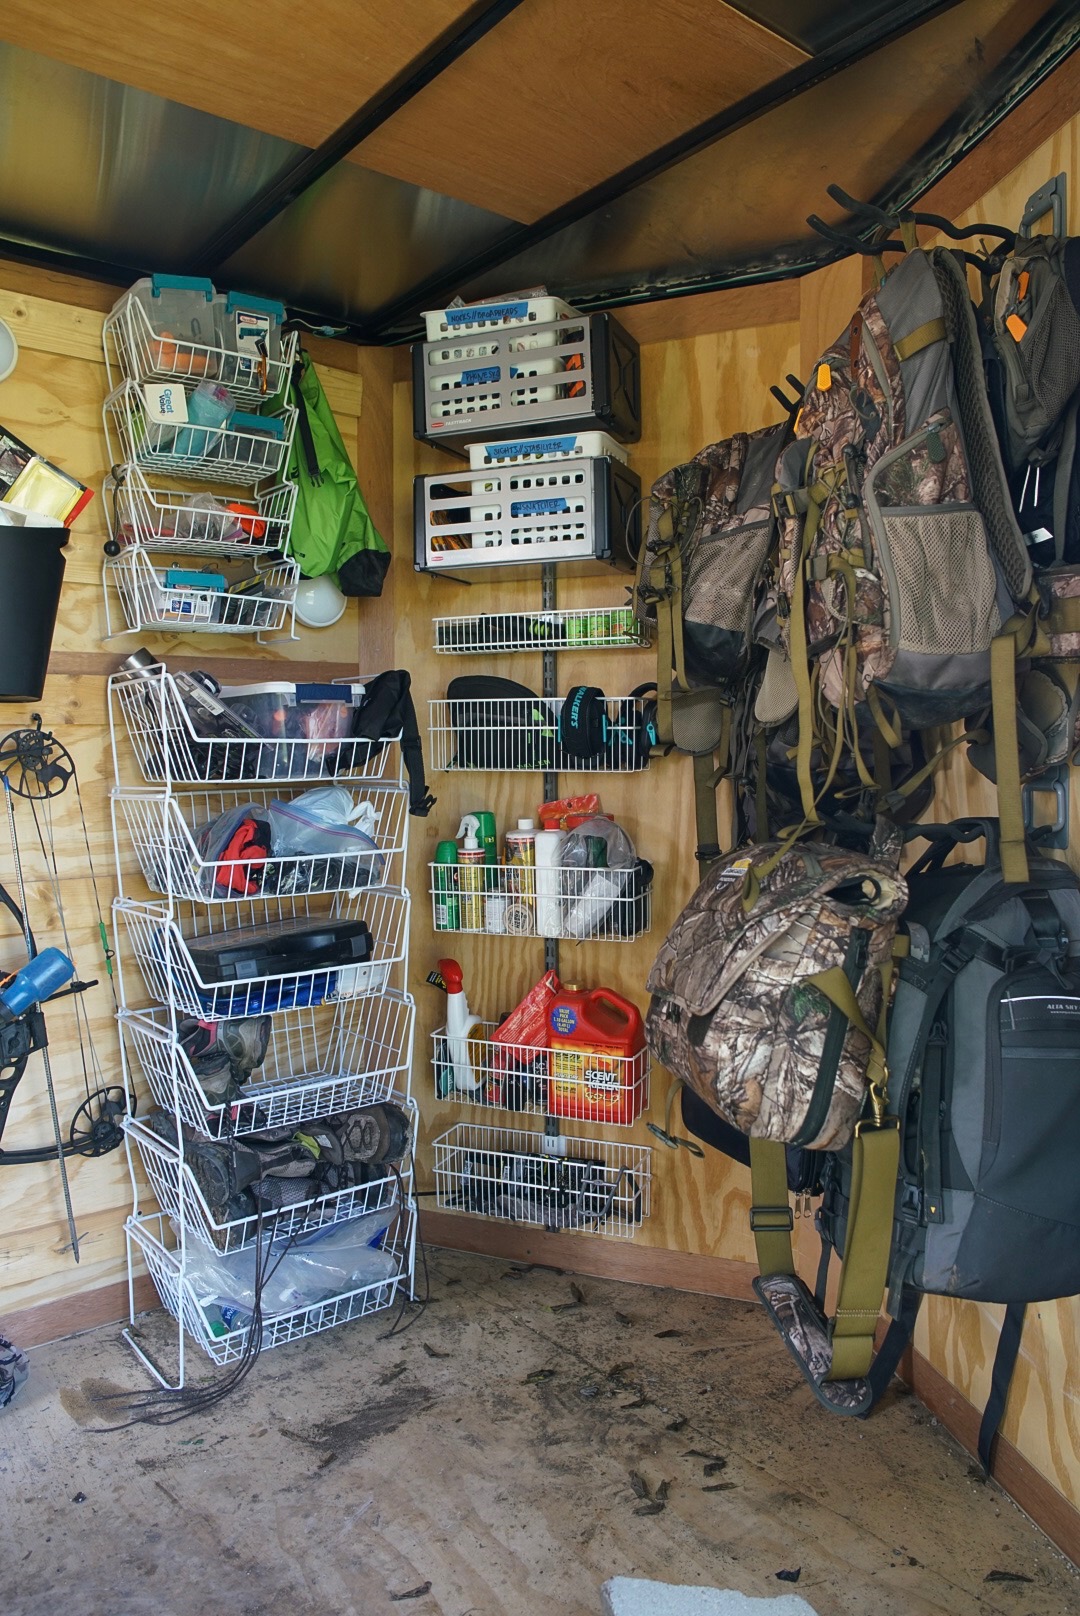
STACKABLE BASKETS
There are so many options out there in terms of size and design, but the main thing is to test what containers will fit in them. Really think about the product you’re wanting to store then pick a container for that product, THEN choose baskets that will hold those containers.
For example, the bin that holds all of our flashlights, headlamps, spotlights, etc is a much different size and durability than our facepaint or windchecker bin (for obvious reasons).
BACKPACK SECTION
We have a couple different kinds, but I’d suggest putting longer hooks up top that are capable of holding 2-3 backpacks such as this one that can fold up when it’s not being used. Then install a more shallow hook on bottom (that might only hold one backpack) so you don’t eat up the floor space. We also end up storing decoy bags, turkey vests, water bladders and other items on these hooks. Please note: we only have this many backpacks because we film our hunts and/or create a lot of content for our partners. Here are links to a few of the Vanguard packs pictured:
Pioneer 2100: Jessica’s main hunting pack
Pioneer 1600rt: Braxton’s main hunting pack
Vanguard Alta Sky: filming pack that holds all camera accessories, GoPros, and lenses that don’t get used as often
Pioneer 975rt: used for checking trail cameras - stores our memory cards, batteries, extra trail cameras, mounting brackets, etc.

HAT STORAGE
I’ll be the first to admit there are probably a million better ways to store the hats, but this is what my mind came up with last year and it’s worked well. I laugh every time I see it now, yet haven’t though of a better system so far. I’ll continue to preach, “if it ain’t broke, don’t fix it.” All you need is a ziptie, a paperclip, and a binder clip for each hat. Just use the frame of the trailer to hang them up. This has held every style of hat through the long trips. We always keep 8-10 with us so we don’t have to worry about forgetting them when we pack.

WOOD BORDERS
I highly recommend putting a piece of wood as a border to each shelf to help prevent items from falling off during your travels. This also allows for smaller hooks to be drilled into the wood for more hanging space once you get to where you’re going. As you can see, we often hang our bows on these once they’re out of the case so that they’re not able to fall over or get stepped on. The wood also gives us a way to display some of our favorite brands!
ARROW HOLDERS
Again, duck tape isn’t ideal longterm, but it’s what we had at the time and has worked great so far. The main thing to note is that you don’t need to go spend a fortune on arrow holders when you can cut up PVC pipe (whatever size fits you best) and organize your arrows. As pictured, Braxton’s are on the left while mine are on the right so we can keep them separated when we have the same setup.

LABEL EVERYTHING
Even if it’s just a piece of tape with permanent market, take the time to label as much as possible. Before next season I plan to get more bins and maybe even a label machine just to make things even neater and more specific. It’s worth the time! Just ask my husband who literally only has 2 bins of clothing, yet ends up digging through both of them on every hunt because he won’t organize them.
Meanwhile, I have my gear separated into 4 bins:
Base layers + Early season
Mid-season
Late season
Accessories
OTHER THINGS TO NOTE
Definitely have a small trashcan mounted on the wall! You will use it so much more than you ever imagine, from dirty tissues on those cold morning hunts to the packaging from opening up your broadheads. It’s a nice addition to the trailer.
Mount a battery operated light on the wall, and more than one if possible! It is so nice to have an easily accessible light for late nights and early mornings when the truck might not be hooked to the trailer. We have the push button kind, as well as a light switch, which I prefer because it’s brighter and more durable.
Think about your cooler storage ahead of time because they can take up quite a bit of room. We used to stack ours against the wall (opposite of our storage bins) and strap down with ratchet straps but now that we have a Diamondback cover we’re able to store them in the bed of our truck without being worried about anybody stealing them, which freed up a TON of walking space.
HAVE FUN WITH IT! This is a creative outlet and it’s really exciting to make it your own space.
